
📊 CountQuick
User Manual - Your Meter Readings at a Glance
Home Screen & Overview
Intelligent Insights Carousel
At the top of the home screen, you'll find a scrollable carousel with 4 important overview cards:
⚠️ Overdue Meters
- Shows meters not read for more than 30 days
- Actionable: You see immediately where action is needed
- Example: "2 meters >30 days not read"
📈 Consumption Trend
- Shows whether your consumption is rising or falling
- Comparison with last month in percentage
- Example: "Electricity: +15% vs. last month"
💰 Estimated Monthly Costs
- Projection based on your current consumption
- Only for meters with configured price
- Example: "~$120/month (estimated)"
✅ Status Overview
- Shows how many meters are current (< 60 days)
- Quick overview of your data quality
- Example: "4 of 5 current"
💡 Scrolling the Carousel:
Swipe horizontally across the cards to switch between the 4 views. The dots at the bottom show which card is currently active.
Meter List
Below the carousel, you'll see your meter list:
- Compact cards with icon, name, type and current reading
- Color-coded badges for status (current/overdue)
- Consumption since last reading is displayed
- Costs are shown (if price is configured)
Tap on a meter to go to the detail view
Manage Meters
Add New Meter
1
Tap the Plus button (+)
on the main screen

2
Fill in the required fields:
- Name: e.g., "Apartment Electricity Meter"
- Meter Type: Select the appropriate type (Electricity, Gas, Water, etc.)
- Unit: e.g., kWh, m³, Liter
- Meter Number:(Optional) Your meter's number
- Location:(Optional) e.g., "Basement"
- Multiplication Factor:(Optional) For indirect meters - default is 1.0
- Price per Unit:(Optional) e.g., $0.30 per kWh
💡 Advanced Options:
• Multiplication Factor: For transformer meters or indirect measurement
Example: Meter shows 100, factor is 10 → actual consumption 1,000 kWh
Range: 0.001 to 10,000
• Price per Unit: Automatic cost calculation
Example: $0.30/kWh → Consumption 100 kWh = $30.00 costs
Stored historically correct for each reading

3
(Optional) Add a photo
of the meter by tapping the camera icon
4
Tap "Save"
ℹ️ Note:
In the free version, you can add up to 3 meters. With Premium, you have unlimited meters.
Edit Meter
1
Tap the desired meter in the list
2
Tap the Edit icon(pencil)

3
Change the desired information and save
Delete Meter
1
Open the meter's edit view
2
Tap "Delete Meter"
3
Confirm the deletion
⚠️ Caution:
Deleting a meter will also permanently delete all associated readings!
Record Readings
Add New Reading
1
Select a meter from the list
2
Tap the Plus button (+)
in the meter detail view

3
Enter the meter reading
4
The date
is automatically set to today but can be changed
5
(Optional) Add a photo of the reading:
- Tap the camera icon
- Choose "Take Photo" or "From Gallery"
- The photo will be associated with the reading

6
(Optional) Add a note
7
(Optional) Enable "Meter Change"
if you've installed a new meter
8
Tap "Save"
🔄 Meter Change Function:
If you've installed a new meter (e.g., old reading: 191,478 kWh → new meter: 0 kWh), enable the "Meter Change" checkbox.
What happens:
• Consumption will NOT be calculated from the previous reading
• Your statistics stay correct (no negative values!)
• Segment-based calculation from this point
• Meter change is marked in exports and charts (⚡)
Example:
Old Meter: 191,478 kWh
[Meter Change enabled]
New Meter: 0 kWh → Consumption: - (no value)
Next Reading: 150 kWh → Consumption: 150 kWh ✅
💡 Tip:
Photos help in disputes with utility providers and serve as proof. The app automatically shows consumption since the last reading. For meters with multiplication factor, the actual consumption (raw value × factor) is displayed.
Edit Reading
1
Tap the reading you want to edit in the list
2
Tap the Edit icon
3
Change value, date, photo, or note and save
Delete Reading
1
Open the reading's edit view
2
Tap "Delete Reading"
3
Confirm the deletion
Manage Photos
1
Tap a photo to view it in full screen
2
In the edit view, you can add or remove photos

Export Data
Export as CSV
1
Open a meter's detail view
2
Tap the down arrow (▼)
3
Select "Export as CSV"

4
Choose where to save the CSV file (e.g., Downloads, Cloud)
ℹ️ CSV Format (enhanced in v1.3):
The CSV file contains the following columns:
Standard Columns:
• Meter Name
• Meter Type
• Date + Time (e.g.,
• Reading (RAW value)
• Unit
• Consumption (RAW difference)
• Notes
• Photo Available (Yes/No)
Extended Columns (v1.3):
• Multiplication Factor(if ≠ 1.0)
• Actual Value(reading × factor)
• Actual Consumption(consumption × factor)
• Meter Change(Yes/No)
• Price per Unit(e.g., $0.30/kWh)
• Total Cost(consumption × price)
Compatibility: All 6 ECAS formats are recognized on import!
The CSV file contains the following columns:
Standard Columns:
• Meter Name
• Meter Type
• Date + Time (e.g.,
11/01/2025 16:12:00
EN / 01.11.2025 16:12:00
DE)• Reading (RAW value)
• Unit
• Consumption (RAW difference)
• Notes
• Photo Available (Yes/No)
Extended Columns (v1.3):
• Multiplication Factor(if ≠ 1.0)
• Actual Value(reading × factor)
• Actual Consumption(consumption × factor)
• Meter Change(Yes/No)
• Price per Unit(e.g., $0.30/kWh)
• Total Cost(consumption × price)
Compatibility: All 6 ECAS formats are recognized on import!
⚠️ Note about Photos in CSV Export:
• The CSV file contains a "Photo Available" column with "Yes" or "No"
• This is only an indicator whether a photo exists for the reading
• The photos themselves (image files) are NOT exported
• For complete backups including photos, use the Backup function
• The CSV file contains a "Photo Available" column with "Yes" or "No"
• This is only an indicator whether a photo exists for the reading
• The photos themselves (image files) are NOT exported
• For complete backups including photos, use the Backup function
Export as PDF
👑 Premium Feature:
PDF export is only available in the Premium version.
1
Open a meter's detail view
2
Tap the down arrow (▼)
3
Select "Export as PDF"
4
The PDF file will be created and can be shared or saved

📄 PDF Content (enhanced in v1.3):
The PDF contains a professional overview with:
The PDF contains a professional overview with:
- Meter Details: Name, Type, Unit, Multiplication Factor (if ≠ 1.0)
- Trend Chart: Visual representation of development
- Detailed Table with dynamic columns:
PDF Table Columns (dynamic)
Standard Columns (always present):
- Date: Reading date (⚡ marks meter change)
- Reading: RAW value as read from meter
- Unit: e.g., kWh, m³, Liter
Extended Columns (when relevant):
- Consumption: Difference to previous reading (RAW value)
- Actual Value: Appears only if multiplication factor ≠ 1.0
- Actual Consumption: Consumption × factor (only with factor)
- Meter Change: Yes/No column
- Price per Unit: Only if configured on reading
- Total Cost: Only if price is available (consumption × price)
- Notes: Only if notes are present
💡 Intelligent Columns:
The PDF only shows relevant columns. If you haven't set a multiplication factor, the factor columns don't appear. This keeps the PDF clean and organized!
⚠️ Performance Limit:
PDFs are limited to maximum 300 entries for optimal performance. For more entries, use CSV export.
Meter Change in PDF
If you've marked a meter change:
- Date is marked with ⚡ symbol
- Consumption shows "-" (no calculation from old meter)
- Meter Change column shows "Yes"
- Next reading calculates consumption correctly from new zero point
Example PDF Layout:
READINGS - Home Electricity Meter
Type: Electricity | Unit: kWh | Multiplication Factor: ×1.5

┌──────────────────────────────────────────────────┐
│ Date     │ Reading │ Actual │ Cons.  │ Cost    │
├──────────────────────────────────────────────────┤
│ 02/05/24 │ 7510    │ 11265  │ 15 kWh │ $4.50   │
│ 02/04/24⚡│ 0       │ 0      │ -      │ -       │
│ 02/03/24 │ 7500    │ 11250  │ 10 kWh │ $3.00   │
└──────────────────────────────────────────────────┘
Import Data (CSV)
You can import readings from CSV files. The app automatically recognizes the meter name from the filename and creates the meter if it doesn't exist.
Import CSV File
1
Open Settings
2
Tap "Import from CSV"

3
Select the CSV file from your device
4
The app imports the data automatically:
- Meter name is recognized from filename
- Meter is created if it doesn't exist
- All readings are imported
- Duplicates (same date) are skipped
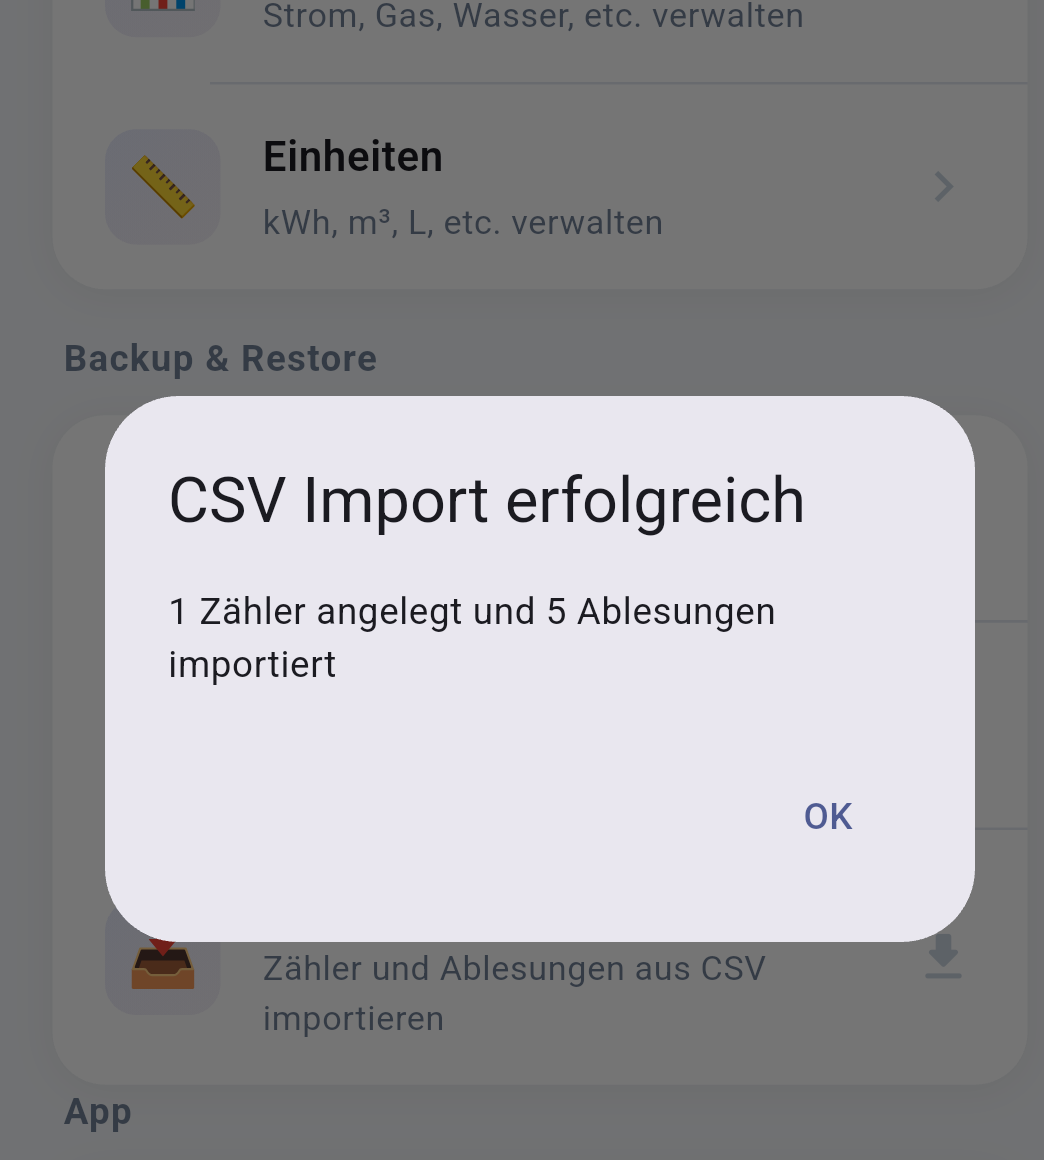
5
After successful import, you'll see a confirmation with the number of imported readings
Filename is Important!
📋 Meter Name from Filename:
The filename becomes the meter name!
How it works:
• File extension
• Timestamp at the end (e.g.,
• Underscores (
Examples:
•
•
•
⚠️ Important: Name your CSV file as you want your meter to be called!
How it works:
• File extension
.csv
is removed• Timestamp at the end (e.g.,
_20260101_183712
) is removed if present• Underscores (
_
) become spacesExamples:
•
electricity_meter.csv
→ Meter: "electricity meter"•
apartment_meter.csv
→ Meter: "apartment meter"•
power_-_feed_in_20260101_183712.csv
→ Meter: "power - feed in"⚠️ Important: Name your CSV file as you want your meter to be called!
CSV File Format
The CSV file must have the following structure:
Supported CSV Formats:
The app automatically recognizes different formats and adapts:
Format 1: Standard (CountQuick/Excel)
Date,Reading,Unit,Consumption,Note
- Date: MM/dd/yyyy HH:mm:ss or MM/dd/yyyy
- Reading: Numeric value (Required)
- Additional columns optional
Format 2: ECAS Format (Standard)
Date,Reading
- Date: yyyy-MM-dd HH:mm:ss
- Reading: Numeric value
- Example:
2010-11-01 16:12:00,144836.0
Format 3: ECAS Format (Semicolon Variant)
Date,Time;Reading
- Date: yyyy-MM-dd
- Time;Value: HH:mm:ss;Reading
- Example:
2010-11-01,16:12:00;144836.0, - ⚠️ Special: Time and value separated by semicolon
✨ Automatic Detection:
You don't need to configure anything! The app automatically detects which format is used and imports accordingly.
Example 1: CountQuick Export (English with time):
Date,Reading,Unit,Consumption,Note,Photo Available
09/01/2025 08:30:00,3328.00,kWh,-,,No
10/04/2025 16:45:00,4050.00,kWh,722.00,,No
11/15/2025 14:20:00,4892.00,kWh,842.00,High consumption,No
Example 2: ECAS Format (Standard):
Date,Reading
2010-11-01 08:00:00,144836.0
2010-11-01 16:00:00,144848.0
2010-11-01 20:00:00,144854.0
Example 3: ECAS Format (Semicolon Variant):
Date,Reading
2010-11-01,08:00:00;144836.0,
2010-11-01,16:00:00;144848.0,
2010-11-01,20:00:00;144854.0,
Example 4: Without time (imported as 00:00:00):
Date,Reading,Unit,Consumption,Note
09/01/2025,3328.00,kWh,-,
10/04/2025,4050.00,kWh,722.00,
11/15/2025,4892.00,kWh,842.00,High consumption
✅ Notes:
• Header row is automatically skipped
• Decimal separator: Both comma and period work
• Automatic format detection: ECAS semicolon format is recognized
• Duplicate detection:
• Header row is automatically skipped
• Decimal separator: Both comma and period work
• Automatic format detection: ECAS semicolon format is recognized
• Duplicate detection:
- With time: Same meter + same date + same time (hour:minute) = duplicate is skipped
- Without time: Same meter + same date = duplicate is skipped
- Example: Three readings on the same day with different times will all be imported!
- Meter name is extracted from filename
- If meter doesn't exist → will be created
- If meter exists → import is cancelled (duplicate protection)
⚠️ Important Notes:
• One meter per CSV file: Only one meter can be processed per import
• Header required: CSV must have a header row
• Supported date formats:
• Filename important: Processed to meter name
• Meter exists: Import is completely cancelled if meter exists
• One meter per CSV file: Only one meter can be processed per import
• Header required: CSV must have a header row
• Supported date formats:
-
MM/dd/yyyy HH:mm:ss(English with time) -
MM/dd/yyyy(English without time) -
yyyy-MM-dd HH:mm:ss(ECAS standard) -
yyyy-MM-dd,HH:mm:ss;Value(ECAS semicolon) -
dd.MM.yyyy HH:mm:ss(German format with time) -
dd.MM.yyyy(German format without time)
• Filename important: Processed to meter name
• Meter exists: Import is completely cancelled if meter exists
Import Result
After import, the following is displayed:
- Name of the created/used meter
- Number of successfully imported readings
- Number of skipped duplicates (if any)
Use Statistics
1
Tap the Statistics icon
in the bottom navigation or on the statistics card in the meter detail view

Three Display Forms
📈 Line Chart
- Shows trend of readings over time
- Intelligent Y-axis scaling for best readability
- Horizontally scrollable for large datasets
- Shows trends and developments at a glance
- Meter changes are marked (⚡)
📊 Bar Chart
- Shows daily/weekly/monthly consumption
- Perfect for comparing time periods
- Color coding for better overview
- Horizontally scrollable for many bars
- Automatically considers multiplication factor
📋 Table View
- Detailed list of all readings
- Shows date, value, consumption, costs
- Responsive design (uses full screen width)
- Sortable by various criteria
- Ideal for exact numbers and export preparation
💡 Switch View:
Tap the icons at the top of the screen to switch between line chart, bar chart and table.
Intelligent Filters
1
Tap "Filter"
at the top of the screen
2
Select the desired time period:
- Day: Shows data from last 24 hours
- Week: Shows data from last 7 days
- Month: Shows data from current month
- Year: Shows data from current year
- Since Meter Change: Shows only data since last meter change
- All Data: Shows complete history
3
The number of found data points is displayed directly
✨ Smart Filter:
The app automatically shows the optimal time period - always at least 10 data points for meaningful statistics.
Statistics Cards in Meter Details
Directly in the meter detail view you'll find a clickable statistics card with:
- Total Consumption: Sum since first reading
- Average per Day: Projection based on your data
- Costs (if configured): Automatically calculated with price per unit
- Last Reading: Date and value
Tap the statistics card to go to the detailed view
👑 Extended Statistics (Premium):
• Select custom time periods
• All historical data without limit
• Detailed cost analyses
• Export statistics as PDF
• Select custom time periods
• All historical data without limit
• Detailed cost analyses
• Export statistics as PDF
Cost Overview
If you've configured a price per unit
on the meter:
- Automatic cost calculation for each reading
- Total costs are displayed in statistics
- Costs consider multiplication factor
- Historically correct (old price stays with old readings)
Example:
Consumption: 300 kWh
Multiplication Factor: ×1.5
Actual Consumption: 450 kWh
Price: $0.30/kWh
→ Costs: $135.00
Consumption: 300 kWh
Multiplication Factor: ×1.5
Actual Consumption: 450 kWh
Price: $0.30/kWh
→ Costs: $135.00
Backup & Restore
Create Backup
1
Open Settings(gear icon)
2
Scroll to the "Data Backup"
section
3
Tap "Create Backup"

4
Choose a storage location (e.g., Downloads, Cloud service)
5
The backup file will be created in JSON format
💾 Backup Content:
The backup contains all meters, readings, settings, and photos. Store it safely!
⚠️ Important:
Create backups regularly, especially before switching to a new device or before updates!
Restore Backup
1
Open Settings
2
Tap "Restore Backup"
3
Select the backup file
4
Confirm the restoration
5
The app imports all data and restarts
⚠️ Caution:
Restoring a backup will overwrite all current data!

Premium Upgrade
Why Premium?
👑 Premium Benefits:
- ✅ Unlimited number of meters (instead of 3)
- ✅ No ads
- ✅ PDF export
- ✅ Extended statistics
- ✅ One-time payment of only €2.99
- ✅ Lifetime license - no subscriptions!
Purchase Premium
1
Open Settings
2
Tap "Upgrade to Premium"

3
Review the Premium benefits
4
Tap "Upgrade now for €2.99"
5
Confirm the purchase in Google Play Store
6
Premium is activated immediately - the app restarts automatically
✅ One-time Payment:
No subscription! You pay once and use Premium forever on all your devices with the same Google account.
Check Premium Status
In Settings, you can see your current status (Free or Premium)
Settings
1
Tap the gear icon
in the bottom navigation

Language Settings
1
Open Settings
2
Tap "Language"
3
Select your preferred language:
- 🇩🇪 Deutsch
- 🇬🇧 English

4
The app switches language immediately without restart
🌍 Fully Multilingual (v1.3):
All areas of the app are completely translated:
All areas of the app are completely translated:
- ✅ All menus, dialogs and screens
- ✅ CSV/PDF exports (including column headers)
- ✅ Date formats (DE: dd.MM.yyyy / EN: MM/dd/yyyy)
- ✅ Number formats (DE: 1.234,56 / EN: 1,234.56)
- ✅ Error messages and confirmations
- ✅ Statistics texts and charts
- ✅ Premium dialogs and in-app purchases
Number Format
1
Open Settings
2
Tap "Decimal Separator"
3
Select your preferred format:
- Comma (,): German (1.234,56)
- Period (.): International (1,234.56)
💡 Note:
The number format affects all displays and exports and is saved independently of the language setting.
Manage Meter Types
Meter types define the kind of meter (e.g., Electricity, Gas, Water). The app comes with predefined types, but you can also create your own.
Predefined Meter Types:
- ⚡ Electricity
- 🔥 Gas
- 💧 Water
- ☀️ Solar
- 🌡️ Heating
Create Custom Meter Type
1
Go to Settings
→ "Manage Meter Types"

2
Tap the Plus button
3
Enter a name (e.g., "Pellet Heating")
4
Optionally select an icon
5
Save the new type
Edit or Delete Meter Type
1
Tap the meter type in the list
2
Edit the name or delete the type
⚠️ Note:
Predefined default types cannot be deleted. Custom types can only be deleted if they are not used by any meters.
Manage Meter Units
Meter units define the measurement unit (e.g., kWh, m³, Liter). The app comes with the most common units.
Predefined Units:
- kWh (Kilowatt-hour) - for electricity
- m³ (Cubic meter) - for gas and water
- Liter - for oil or water
- kg - for pellets
Create Custom Unit
1
Go to Settings
→ "Manage Units"

2
Tap the Plus button
3
Enter the unit name (e.g., "MWh")
4
Save the new unit
Edit or Delete Unit
1
Tap the unit in the list
2
Edit the name or delete the unit
⚠️ Note:
Units can only be deleted if they are not used by any meters.
Filter & Sort
Filter Meters
1
Tap the filter icon
on the main screen

2
Select filter criteria:
- Meter Type: Show only Electricity, Gas, Water, Solar, etc.
- Status: Current / Overdue / No Entries
- Reading Status: Read this month / Not read
- Search: Find meters by name or number
🔍 Search Function:
Enter search terms in the search field to filter meters by name, meter number, or location. The search works in real-time.
Enter search terms in the search field to filter meters by name, meter number, or location. The search works in real-time.
3
The list shows only filtered meters with count display
4
Tap "Reset Filter"
to show all meters again
Status Filters
Current:
Shows all meters that were read within the last 60 days
Overdue:
Shows meters that haven't been read for more than 30 days
No Entries:
Shows meters that have never been read
Read this Month:
Shows meters with at least one reading in the current month
Sort Meters
1
Tap the sort icon
on the main screen
2
Select sorting:
- Name (A-Z): Alphabetically by name
- Name (Z-A): Alphabetically descending
- Type: Grouped by meter type
- Last Reading: Newest first

💡 Tip:
The sorting is saved, even after closing the app.
Dark/Light Mode
CountQuick supports both light and dark design for comfortable work at any time of day.
Change Theme
1
Open Settings
2
Tap "Design"
or "Theme"

3
Select your preferred design:
- ☀️ Light: Light design for day
- 🌙 Dark: Dark design for night
- 📱 System: Follows device settings
4
The design changes immediately without restart

💡 Recommendation:
The "System" option automatically adapts to your device settings and switches to dark design in the evening, for example.